The Ultimate Pressed Sandwich
In our house I’m known as the sandwich queen. I admit it; I make a mean sandwich. It is a big burden to bear but I like to think I’m up for the challenge. I’ve had a lot of practice.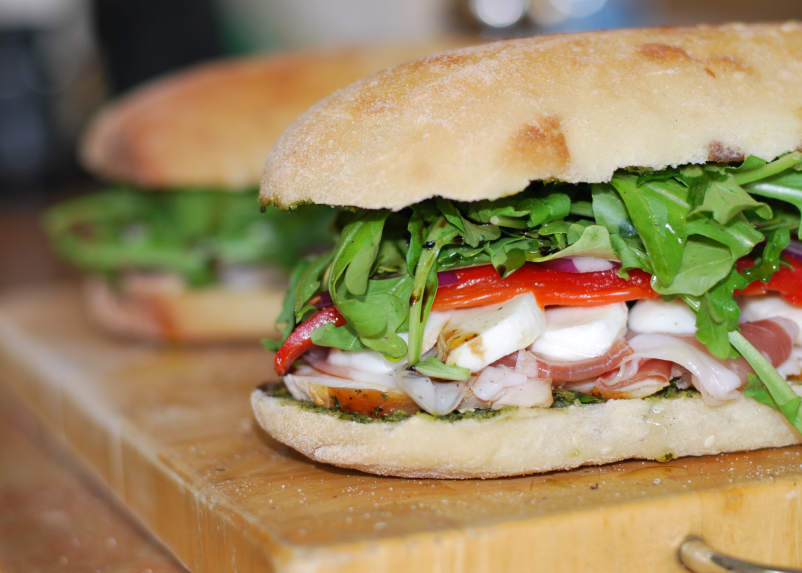
Growing up I used leftovers from the previous night’s dinner for my creations. Leftover steak or chicken or pork, whatever was there really. I would slice it thinly and then spread my mayo on the bread taking care to hit every single edge with a little mayo love. I’d then carefully lay down the meat from corner to corner making sure I would get a bit in every bite. Then I would stack the veggies on and finally place the second slice of bread on top; of course making sure to lay the top piece so it absolutely matched the bottom slice of bread, because any other way would just be, well, wrong.
It was always about the time I was laying that top piece on, and I was cutting it in half, that my dad would (conveniently) wander into the kitchen. I’d grab a glass and turn to the refrigerator to pour a glass of milk and no fail, when I would turn back around, a huge (and I mean huge) bite would be taken out of half of my sandwich. Dad, with a grin, would say, “I just wanted to make sure it was safe for you to eat.” Geez. Thanks dad.
It would make me so mad when he would do that. Here I had just spent all that time putting it together, using the last of the leftovers, only for dad to gobble it up leaving no more leftovers for me to make another one. He knew it irked me, yet it was his thing. Today, many years later, it’s remembering moments like these that make me smile.
So you see, taking care when making a sandwich, has always been sorta a thing with me. Today’s Ultimate Pressed Sandwich is no different. I went and picked up the best items I could find and carefully spread and stacked and then pressed this little lovely. Pressed sandwiches served cold or at room temperature are a nice change from the norm. They are quite pretty with all the colorful layers. They stay together well and can be cut into small portions for party trays or wrapped into individual portions and taken on a hike or a picnic. Or for us, a casual dinner on the patio, served with a tossed salad with balsamic vinaigrette, and a glass (ok maybe two) of Malbec.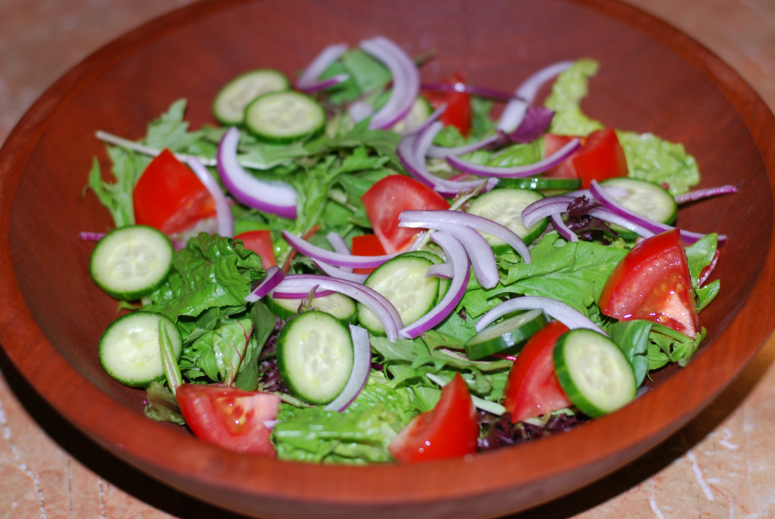
The flavor combinations are limitless so please don’t feel you need to stick to my flavor profile. I will say this, however, do try to keep your items on the drier side. When you press the sandwich any ingredient with too much water content will end up soaking your bread making it mushy. There’s no mushy allowed. Therefore, tomatoes might not be the best idea. Also, keep the wetter items to the middle of the sandwich so the drier items can act as a barrier keeping the mushy at bay.
Enjoy! And much love from the Sandwich Queen.
The Ultimate Pressed Sandwich
~Start by gathering your ingredients: Ciabatta (or some other crusty bread like the Turkish bread shown here), sliced chicken breast, prosciutto, pesto (store bought or homemade ~ don’t worry recipe to come soon!), fresh buffalo mozzarella or sliced bocconcini, roasted red peppers, thinly sliced red onion, arugula (rocket), olive oil, balsamic vinegar, salt and pepper. 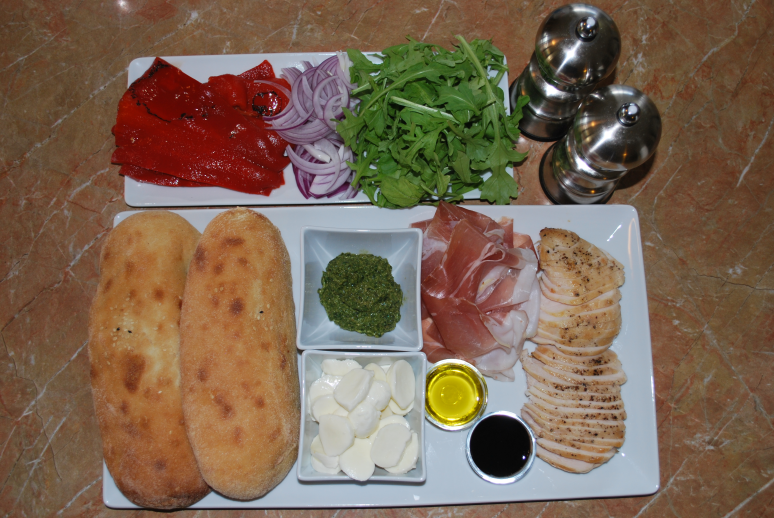
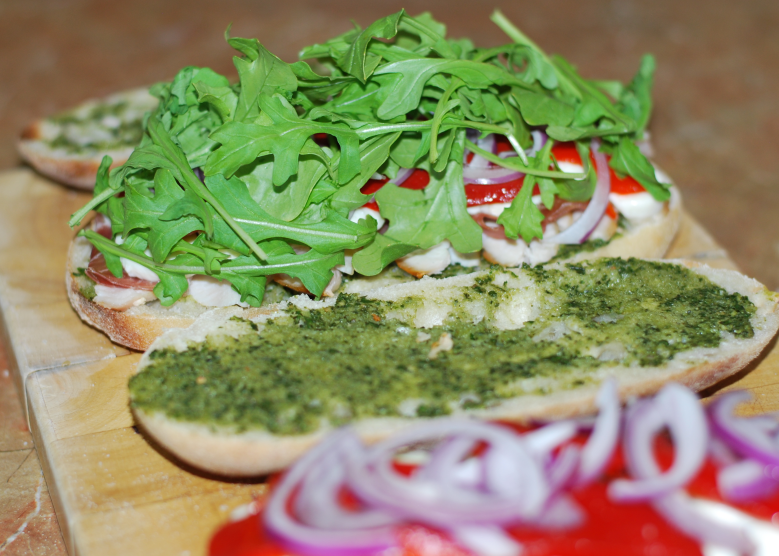
~Slice your bread in half and spread pesto evenly across all pieces of bread. **Hint ~ Use a serrated knife to slice your bread. Place the bread flat on a cutting board. Place one hand on top of the bread to steady it but do not press down. Keep your hand flat and your fingers out of the plane of the knife. Keeping your knife parallel to the cutting board make long strokes to slice the bread. 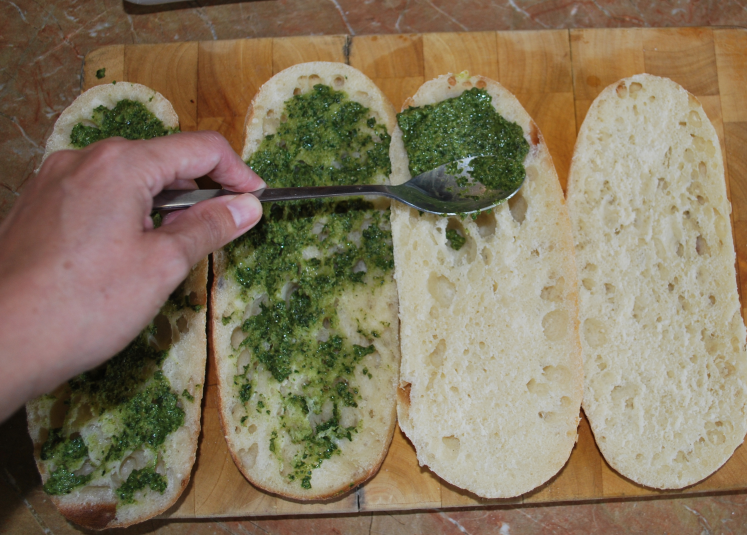 ~ Stack your ingredients on the bread doing your best to keep each ingredient evenly distributed and all the way to the edges. Ideally you want one solid layer per ingredient. This will result in the prettiest presentation after you press it and cut it. I stacked mine in this order ~ chicken, prosciutto, bocconcini (salted if needed), roasted red pepper, red onion, arugula, salt, pepper, olive oil, balsamic vinegar.
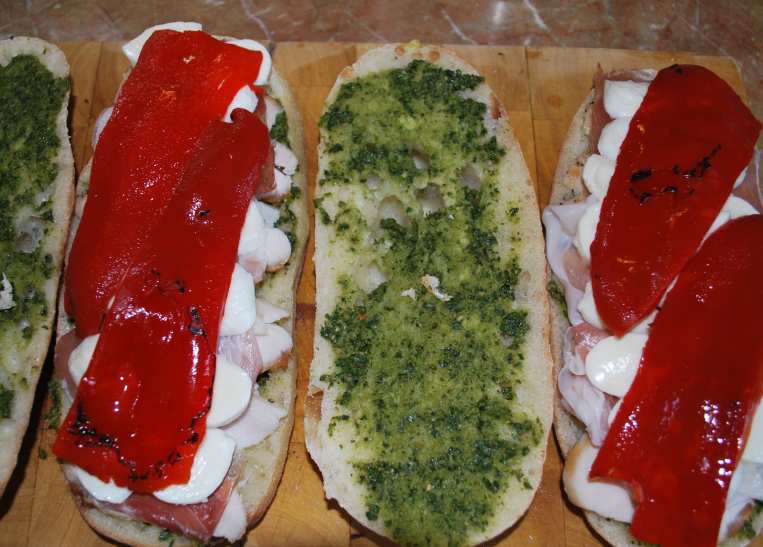
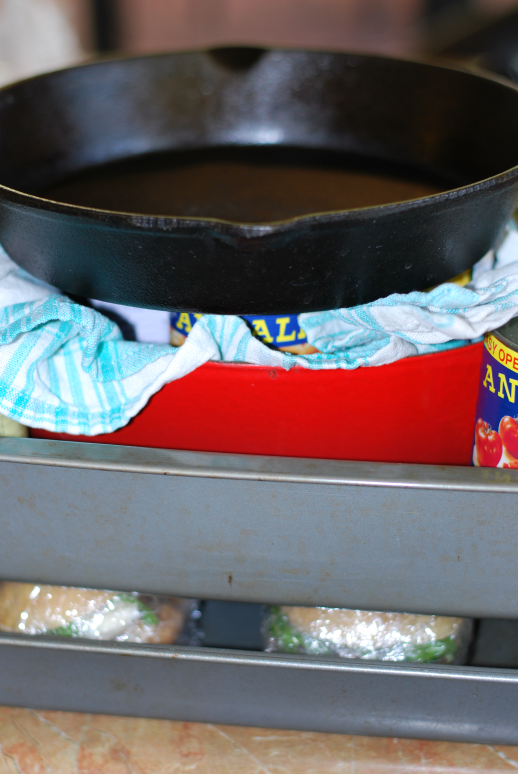
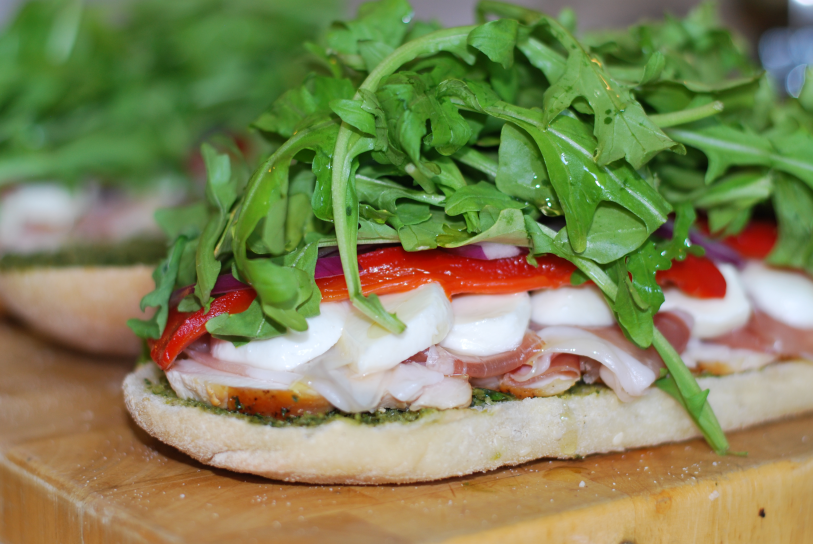 ~Once everything has been stacked and you have seasoned your sandwich with salt, pepper, olive oil and balsamic, place the top piece of bread on, press down and tightly wrap it in plastic wrap. Place sandwiches in a baking pan and place another smaller pan on top of the sandwiches. Fill pan with lots of heavy stuff to press the sandwiches down. Try to keep the weight evenly distributed. I put another heavy pan inside the smaller baking pan and filled everything with canned goods and then placed my cast iron pan on top of it and stored it in the refrigerator for three hours.
 ~After a few hours remove from the refrigerator, unwrap and slice in half so you can see your beautiful work!
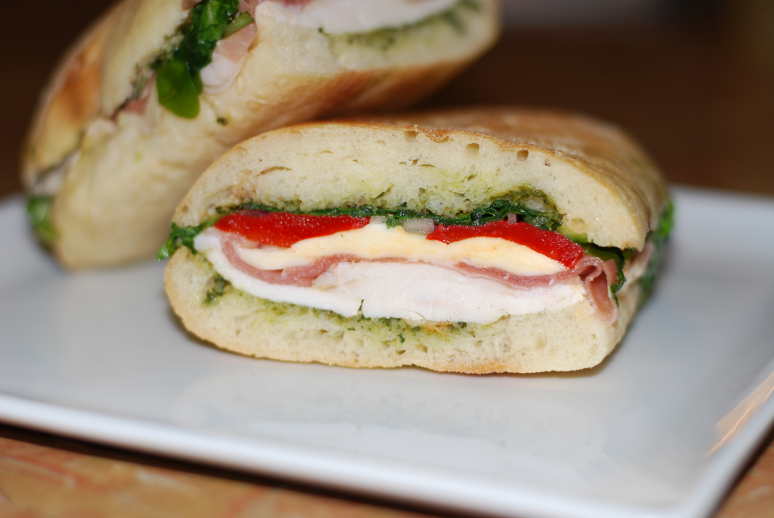
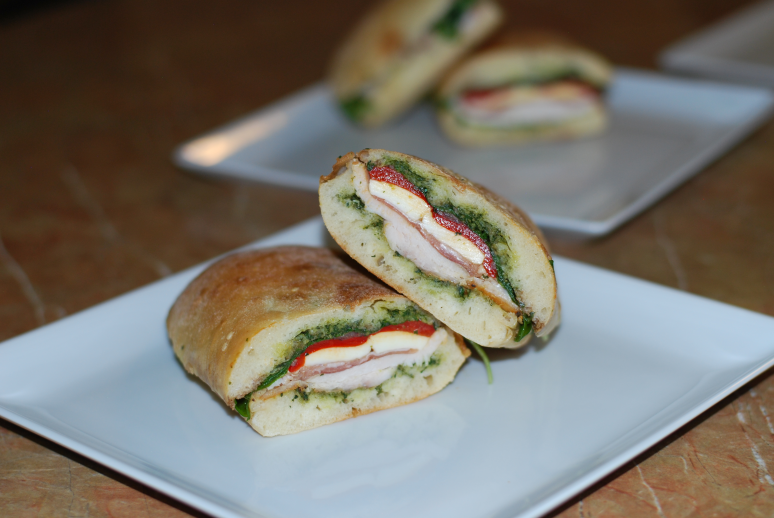 ~For a party platter I would recommend using a large loaf and cutting into small squares after pressing. With a large loaf be very careful to get a completely solid layer per ingredient otherwise some squares might be missing some layers.
5 Comments
Clint
Lauren, you’re killin’ me with these pictures of great food. These look great! For some reason when I think of you as the ‘Sandwich Queen’ there is an ABBA soundtrack playing in the background… Weird huh.
Chinese fish dish?
Lauren
Haha! I love ABBA! I might have to get a kitchen play list going!
Working on it! I plan on a couple test runs this week so hopefully it will come together easily. I also have plans for Dried Cooked Chicken with String Bean if you remember that one. I’ll keep you posted.
Duke
Do you deliver?
Lauren
For you? I sure do!
Peri's Spice Ladle
Oh yum, this sandwich is mouthwatering, it has some of my absolute favorites in it starting with pesto!